Print Head Replacement
How to replace the print head on your MAXIFY GX Series printer
Important
Only perform this procedure when replacing the print head. Do not perform the following steps for any other reason, as this could cause damage to your product.
- Do not replace the print head while the machine is turned off.
- Do not turn off the machine during the replacement.
- Printing quality after a used print head is removed & reinstalled cannot be guaranteed.
- If the maintenance cartridge has insufficient capacity, print head replacement cannot be performed.
- Some problems may not be resolved by replacing the print head.
- Be careful not to contaminate your hands with ink.
It takes approx. 15 min. to replace the print head.
-
MAXIFY GX3000 Series
1. Turn on the machine.

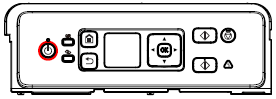
2. Set the machine in the print head replacement mode.
- Push the home button once, then press and hold the Stop button for five or more seconds:
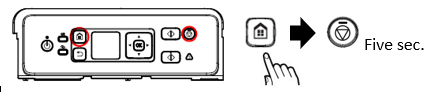
- The message:
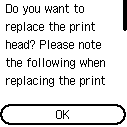 is displayed.
Press the OK button.
3. Open the cover / scanning unit
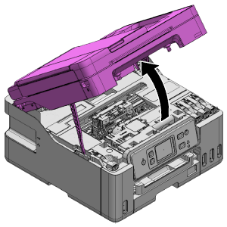
4.Remove the maintenance cartridge.
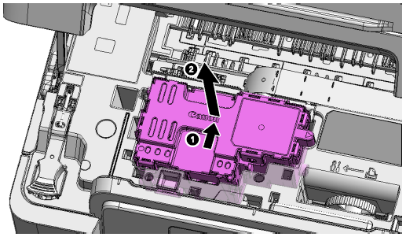
5. Carefully remove the print head
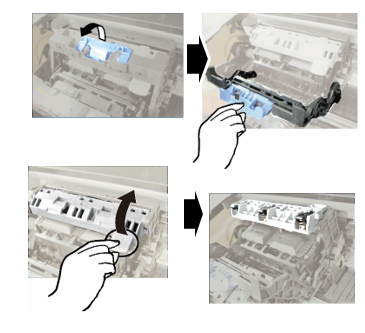
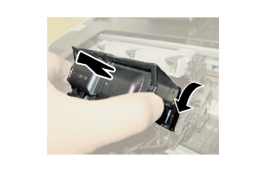
6. Pull out a new print head from the packing box.
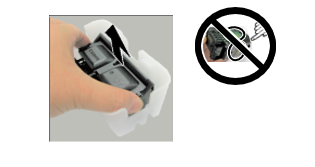
7. Put the print head into the print head holder slowly and securely so that the print head does not touch the parts around it.
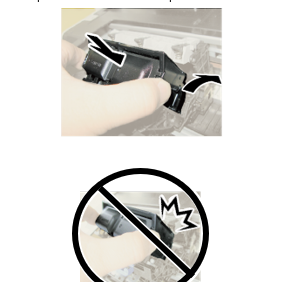
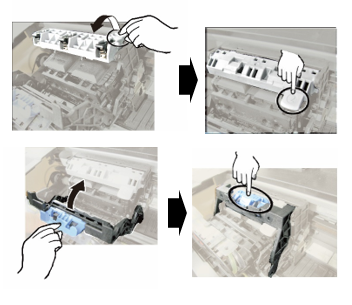
8.Install the maintenance cartridge.
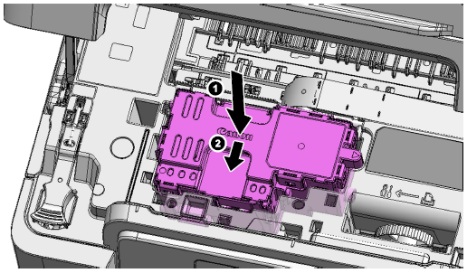
9. After closing the cover/scanning unit, wait for a few minutes. When the home screen is displayed, the print head replacement is completed.
- Push the home button once, then press and hold the Stop button for five or more seconds:
-
MAXIFY GX4000 Series
1. Turn on the machine.
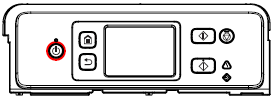
2. Set the machine in the print head replacement mode.
- Push the HOME button once, then press and hold the Stop button for five or more seconds.
- Wait for the next instructions to be displayed for a few minutes.
3. Open the cover / scanning unit
4. Remove the maintenance cartridge.
5. Carefully remove the print head
6. Pull out a new print head from the packing box.
7. Put the print head into the print head holder slowly and securely so that the print head does not touch the parts around it.
8. Install the maintenance cartridge.
9. After closing the cover/scanning unit, wait for a few minutes. When the home screen is displayed, the print head replacement is completed.
-
MAXIFY GX5000 Series
1. Turn on the machine.
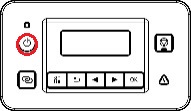
2. Set the machine in the print head replacement mode.
- Push the Back button once, then press and hold the Stop button for five or more seconds.
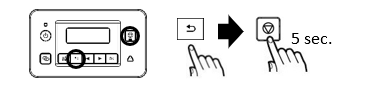
- A message “Processing…” appears. Wait for the next instructions to be displayed for a few minutes.
- Wait for the next instructions to be displayed for a few minutes.
3. Open the cover / scanning unit
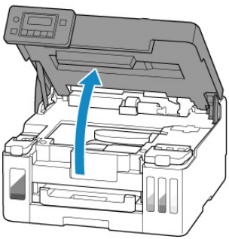
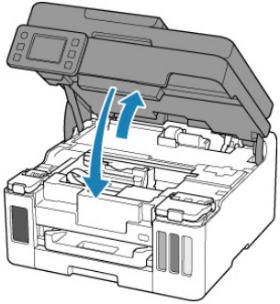
4. Carefully remove the print head
5. Pull out a new print head from the packing box.
6. Put the print head into the print head holder slowly and securely so that the print head does not touch the parts around it.
7. After closing the cover/scanning unit, wait for a few minutes. When the home screen is displayed, the print head replacement is completed.
-
MAXIFY GX5100 Series
1. Turn on the machine.
2. Set the machine in the print head replacement mode.
- Push the Back button once, then press and hold the Stop button for five or more seconds.
- A message “Processing…” appears. Wait for the next instructions to be displayed for a few minutes.
- Wait for the next instructions to be displayed for a few minutes.
3. Open the cover / scanning unit
4. Carefully remove the print head
5. Pull out a new print head from the packing box.
6. Put the print head into the print head holder slowly and securely so that the print head does not touch the parts around it.
7. After closing the cover/scanning unit, wait for a few minutes. When the home screen is displayed, the print head replacement is completed.
-
MAXIFY GX5500 Series
1. Turn on the machine.
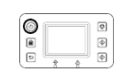
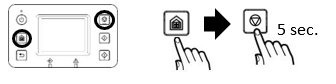
2. Set the machine in the print head replacement mode.
- Push the HOME button once, then press and hold the Stop button for five or more seconds.
- The special notes appear in the next screen. Confirm them and select “Yes.”
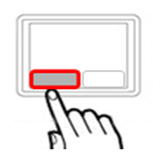
- Wait for the next instructions to be displayed for a few minutes.
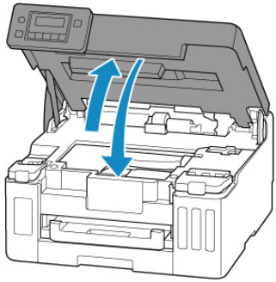
3. Open the cover / scanning unit
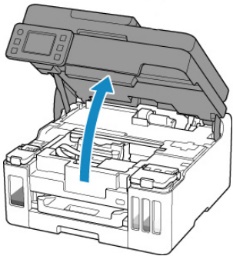
4. Carefully remove the print head
5. Pull out a new print head from the packing box.
6. Put the print head into the print head holder slowly and securely so that the print head does not touch the parts around it.
7. After closing the cover/scanning unit, wait for a few minutes. When the home screen is displayed, the print head replacement is completed.
-
MAXIFY GX6000 Series
1. Turn on the machine.
2. Set the machine in the print head replacement mode.
- Push the HOME button once, then press and hold the Stop button for five or more seconds.
- The special notes appear in the next screen. Confirm them and select “Yes.”
- Wait for the next instructions to be displayed for a few minutes.
3. Open the cover / scanning unit
4. Carefully remove the print head
5. Pull out a new print head from the packing box.
6. Put the print head into the print head holder slowly and securely so that the print head does not touch the parts around it.
7. After closing the cover/scanning unit, wait for a few minutes. When the home screen is displayed, the print head replacement is completed.
-
MAXIFY GX6100 Series
1. Turn on the machine.
2. Set the machine in the print head replacement mode.
- Push the HOME button once, then press and hold the Stop button for five or more seconds.
- The special notes appear in the next screen. Confirm them and select “Yes.”
- Wait for the next instructions to be displayed for a few minutes.
3. Open the cover / scanning unit
4. Carefully remove the print head
5. Pull out a new print head from the packing box.
6. Put the print head into the print head holder slowly and securely so that the print head does not touch the parts around it.
7. After closing the cover/scanning unit, wait for a few minutes. When the home screen is displayed, the print head replacement is completed.
-
MAXIFY GX6500 Series
1. Turn on the machine.
2. Set the machine in the print head replacement mode.
- Push the HOME button once, then press and hold the Stop button for five or more seconds.
- The special notes appear in the next screen. Confirm them and select “Yes.”
- Wait for the next instructions to be displayed for a few minutes.
3. Open the cover / scanning unit
4. Carefully remove the print head
5. Pull out a new print head from the packing box.
6. Put the print head into the print head holder slowly and securely so that the print head does not touch the parts around it.
7. After closing the cover/scanning unit, wait for a few minutes. When the home screen is displayed, the print head replacement is completed.
-
MAXIFY GX7000 Series
1. Turn on the machine.
2. Set the machine in the print head replacement mode.
- Push the HOME button once, then press and hold the Stop button for five or more seconds.
- The special notes appear in the next screen. Confirm them and select “Yes.”
- Wait for the next instructions to be displayed for a few minutes.
3. Open the cover / scanning unit
4. Carefully remove the print head
5. Pull out a new print head from the packing box.
6. Put the print head into the print head holder slowly and securely so that the print head does not touch the parts around it.
7. After closing the cover/scanning unit, wait for a few minutes. When the home screen is displayed, the print head replacement is completed.
-
MAXIFY GX7100 Series
1. Turn on the machine.
2. Set the machine in the print head replacement mode.
- Push the HOME button once, then press and hold the Stop button for five or more seconds.
- The special notes appear in the next screen. Confirm them and select “Yes.”
- Wait for the next instructions to be displayed for a few minutes.
3. Open the cover / scanning unit
4. Carefully remove the print head
5. Pull out a new print head from the packing box.
6. Put the print head into the print head holder slowly and securely so that the print head does not touch the parts around it.
7. After closing the cover/scanning unit, wait for a few minutes. When the home screen is displayed, the print head replacement is completed.